
Nous vous invitons à nous contacter, à stabiliser non seulement votre fournisseur fiable, mais aussi à votre partenaire commercial en état de dérivation.
 +(86) -133 8863 9264
May 06,2026
If you've ever looked at a bag of blind rivets and wondered what those numbers actually mean — or whether the size refers to the head, the body, or something else entirely — you're not alone. It's one of the most common points of confusion for anyone new to riveting, and even experienced tradespeople occasionally mix it up. The short answer is: blind rivet size is determined by the diameter of the shank (the cylindrical body), not the head. The head size varies by rivet style and is not part of the sizing designation. This article explains exactly how blind rivet sizing works, how to read rivet size codes, and how to make sure you're choosing the right rivet for your application every time.
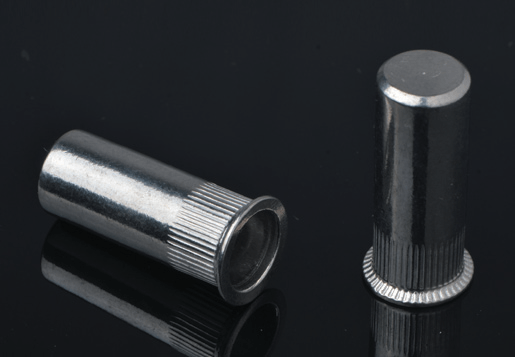
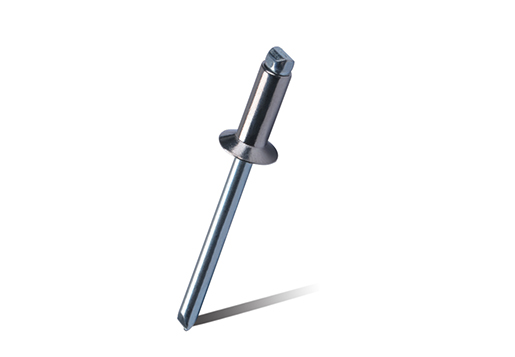
Before diving into sizing, it helps to understand what a blind rivet is physically made of, because the naming conventions follow the physical structure directly. A blind rivet — also called a pop rivet — consists of two components: the rivet body and the mandrel (also called the stem or pin).
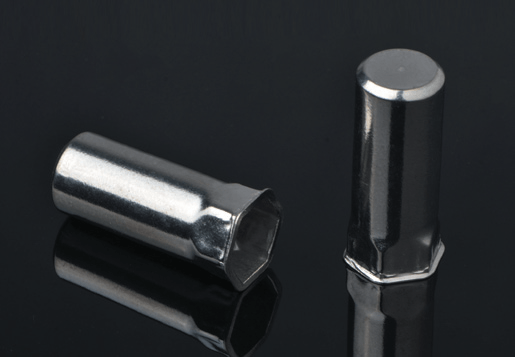
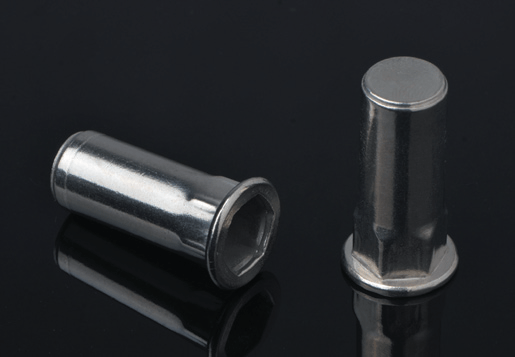
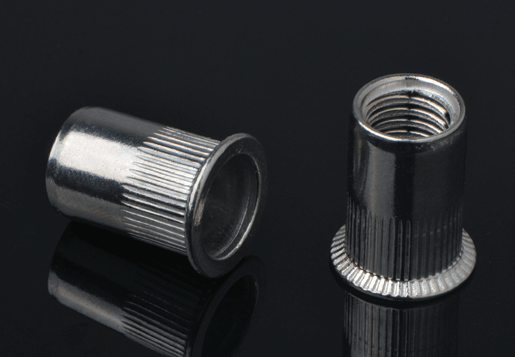
The rivet body has three distinct sections. The head is the flange at one end that sits on the outer surface of the material being joined and distributes the clamping load. The shank (also called the barrel or body) is the cylindrical portion that passes through the pre-drilled hole in the materials being joined. The tail end is the open end of the shank that deforms and expands on the blind side of the joint when the mandrel is pulled through, creating the locking head that clamps the materials together.
The mandrel is the thin steel pin that runs through the center of the rivet body. During installation, a rivet tool grips the mandrel head and pulls it through the rivet body with force. This action expands the tail end of the shank against the blind side of the material. Once the clamping force reaches the designed level, the mandrel snaps at a pre-weakened break point, leaving the rivet set and the broken mandrel stub either retained inside the rivet or expelled, depending on the rivet design.
With this structure in mind, the sizing logic becomes clear: the shank is the part that must fit precisely through a drilled hole, so shank diameter is the primary dimension. The head sits on the surface and its diameter is determined by the head style chosen, not by a sizing variable. The head is a design feature; the shank is a fitment dimension.
Blind rivet sizing uses two dimensions: the shank diameter and the grip range. Together, these two numbers tell you everything you need to know to match a rivet to a specific hole size and material stack thickness. The head diameter is never part of the size designation — it is implied by the head style selected separately.
The shank diameter is the outside diameter of the cylindrical rivet body. It must match the hole diameter drilled through the materials being joined. The fit should be snug but not forced — typically a clearance of 0.1mm to 0.2mm between the shank diameter and the hole diameter. Too large a clearance and the rivet will not clamp the materials together effectively; too small and the rivet won't pass through the hole at all.
In the imperial sizing system used widely in the United States and United Kingdom, shank diameters are designated in 32nds of an inch. A size designation of "4" means 4/32 of an inch (0.125 inches or 3.175mm). A size "5" means 5/32 of an inch (0.156 inches or approximately 4mm). In metric markets, shank diameters are stated directly in millimeters — the most common being 3mm, 4mm, 4.8mm, 5mm, and 6mm.
The grip range is the total thickness of material that a specific rivet length can clamp together. It is expressed as a minimum and maximum — for example, a grip range of 3mm to 6mm means the rivet will form a proper joint on material stacks between 3mm and 6mm thick. If the combined material thickness falls outside this range, the rivet will either fail to form a proper blind head (too thick) or the mandrel will break before generating adequate clamping force (too thin).
In the imperial sizing system, grip range is the second number in the two-number rivet designation and is measured in 16ths of an inch. A designation of "4-6" means a 4/32 inch (1/8 inch) shank diameter with a maximum grip of 6/16 inch (3/8 inch). The minimum grip for most standard rivets is approximately 1/16 inch unless otherwise specified. In metric systems, rivet specifications are usually listed directly as a nominal shank diameter followed by a length — for example, 4 × 12mm — with the grip range stated separately in the product specification.
In North America and the UK, blind rivets are most commonly sold and specified using a two-number code stamped on the packaging — for example, 44, 46, 64, 68, 810. Understanding how to decode this immediately tells you both the shank diameter and the grip capacity.
The first number is the shank diameter in 32nds of an inch. The second number is the maximum grip in 16ths of an inch. Here are the most commonly encountered standard sizes decoded:
| Size Code | Shank Diameter (inches) | Shank Diameter (mm) | Max Grip (inches) | Max Grip (mm) | Drill Size |
| 33 | 3/32" | 2.4mm | 3/16" | 4.8mm | No. 40 / 2.5mm |
| 44 | 4/32" (1/8") | 3.2mm | 4/16" (1/4") | 6.4mm | No. 30 / 3.3mm |
| 46 | 4/32" (1/8") | 3.2mm | 6/16" (3/8") | 9.5mm | No. 30 / 3.3mm |
| 56 | 5/32" | 4.0mm | 6/16" (3/8") | 9.5mm | No. 21 / 4.1mm |
| 64 | 6/32" (3/16") | 4.8mm | 4/16" (1/4") | 6.4mm | No. 11 / 5.0mm |
| 68 | 6/32" (3/16") | 4.8mm | 8/16" (1/2") | 12.7mm | No. 11 / 5.0mm |
| 810 | 8/32" (1/4") | 6.4mm | 10/16" (5/8") | 15.9mm | No. F / 6.5mm |
The drill size listed is the recommended hole size — nominally 0.1mm to 0.15mm larger than the stated shank diameter to allow easy insertion without excessive play. Notice that the size code tells you nothing about the head. A size 46 rivet with a dome head and a size 46 rivet with a large flange head are both "46" — the head style is a separate specification entirely, which is the clearest demonstration that head diameter is not part of the sizing system.
Since head diameter is not part of the rivet size designation, it's worth understanding what the head actually does and why different head styles exist — because choosing the wrong head style for an application is a separate and equally important decision from choosing the right shank size.
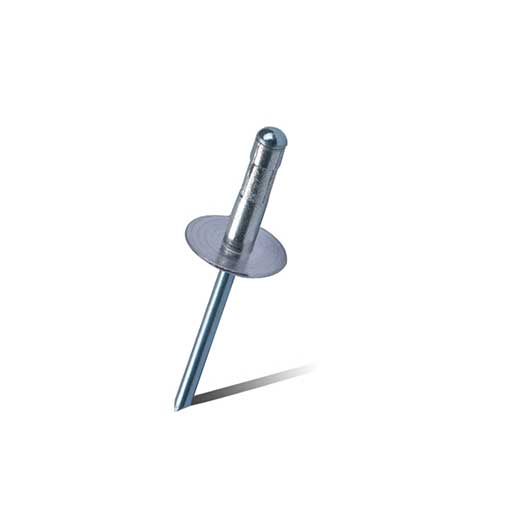
The head of a blind rivet serves two functions: it bears against the outer surface of the material to distribute the clamping load, and it provides the visual finished appearance on the accessible side of the joint. The head diameter determines the bearing area — a larger head distributes the clamping force over a wider area, reducing the stress per unit area on the surface material. This matters significantly when riveting soft, thin, or brittle materials that can crack or deform under a concentrated load from a small head.
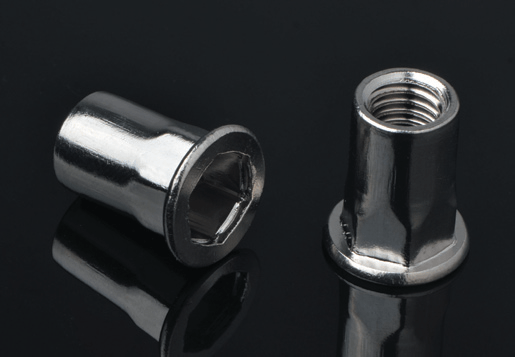
The dome head — also called the round head or universal head — is the standard head style for most general-purpose applications. Its head diameter is typically 2 to 2.5 times the shank diameter. For a 4.8mm shank rivet, a dome head will be approximately 9.5mm to 12mm in diameter. It provides a good balance of bearing area, a low profile above the surface, and clean appearance. The dome head is appropriate for metal-to-metal joints, plastic joining, and most structural applications where surface stress is not a concern.

The large flange head — also called the oversized head or bulb head — has a head diameter approximately 3 to 4 times the shank diameter, significantly larger than a dome head on the same shank size. A 4.8mm shank large flange rivet may have a head diameter of 14mm to 16mm or more. This large bearing area is specifically designed for joining soft materials — foam panels, thin plastics, fiberglass, wood composites, and rubber — where a standard dome head would pull through the surface under load. The large flange head spreads the clamping force over a wider area, preventing pull-through without needing a separate washer.
The countersunk head is designed to sit flush with the material surface after installation. It requires a countersunk (beveled) hole drilled at the same angle as the rivet head — typically 90° or 120° included angle. Because the head sits below or level with the surface, it provides no protruding bearing area and is not appropriate for soft or thin materials where surface stress is a concern. Countersunk rivets are used for aerodynamic surfaces, flooring, decorative panels, and any application where a flush, snag-free surface is required. The head diameter on a countersunk rivet is typically similar to or slightly smaller than a dome head of the same shank size, but the relevant dimension for installation is the countersink angle, not the head diameter.
In metric markets — most of Europe, Australia, and increasingly international supply chains — blind rivet specifications are stated directly in millimeters rather than using the fractional code system. A metric rivet specification typically reads as diameter × length — for example, 4 × 10, 4.8 × 12, or 6 × 16. The diameter is the shank diameter in millimeters, and the length is the overall rivet body length before installation in millimeters.
The grip range is usually published separately in the product datasheet or printed on the packaging. For a 4.8 × 12mm rivet, for example, the grip range might be stated as 3.0mm to 6.5mm, meaning the combined material thickness must fall within that range for the rivet to set correctly. If you're working from a metric specification and need to convert to an imperial size code for purchasing from a US or UK supplier, the following equivalents cover the most common sizes:
| Metric Shank Diameter | Imperial Equivalent | Imperial Size Code (first digit) | Recommended Drill Bit |
| 2.4mm | 3/32" | 3 | 2.5mm / No. 40 |
| 3.2mm | 1/8" | 4 | 3.3mm / No. 30 |
| 4.0mm | 5/32" | 5 | 4.1mm / No. 21 |
| 4.8mm | 3/16" | 6 | 5.0mm / No. 11 |
| 6.0mm | 15/64" (close) | — | 6.1mm / No. B |
| 6.4mm | 1/4" | 8 | 6.5mm / No. F |
With the sizing logic clear, selecting the correct rivet for a specific application is a straightforward three-step process. Getting all three steps right guarantees a proper joint; missing any one of them leads to a weak, loose, or failed installation.
The hole diameter is driven by the shank diameter of the rivet, which in turn should be matched to the structural requirements of the joint. As a general rule, larger shank diameters provide higher shear strength and are appropriate for heavier loads. For light-duty sheet metal, plastics, and trim fastening, a 3.2mm (1/8") shank is typically adequate. For structural joints in metal fabrication, trailer construction, and heavy equipment, 4.8mm (3/16") or 6.4mm (1/4") shanks are more appropriate. Once the shank diameter is determined, drill the hole 0.1mm to 0.15mm larger than the shank to ensure easy insertion.
Measure the combined thickness of all the layers being joined at the rivet location. This is your required grip. Select a rivet whose grip range comfortably includes your measured thickness — ideally with your measurement falling in the middle third of the grip range rather than at the extreme minimum or maximum. If your material stack is 5mm thick, a rivet with a grip range of 3mm to 7mm is a better choice than one rated 4.5mm to 6mm maximum, even though both technically cover 5mm.
With shank diameter and grip range determined, choose the head style based on the material being joined and the surface requirements. Use a dome head for standard metal-to-metal joints. Use a large flange head for soft, thin, or fragile materials. Use a countersunk head where a flush surface is required. The head choice does not change the size code — a size 46 dome head and a size 46 large flange head are both "size 46," installed in the same 3.3mm hole, with the same grip range. Only the surface bearing area and profile differ.
Even with the correct understanding of how rivet sizing works, a few specific mistakes come up repeatedly in practice. Being aware of them prevents wasted fasteners and failed joints.
Rivet material affects not just strength but also how the rivet deforms during setting and how it behaves in service. From a sizing perspective, material choice can influence the required hole tolerance and the grip range performance at extremes of the stated range.


")
")
")

Copyright © Stable Industrial Fasteners Co., Ltd. All Rights Reserved


 En
En